
Growing carrots is easy if you know how to do it properly and what to watch out for, so in this guide, I will tell you all there is to know in order to grow your very own carrots at home in a container!
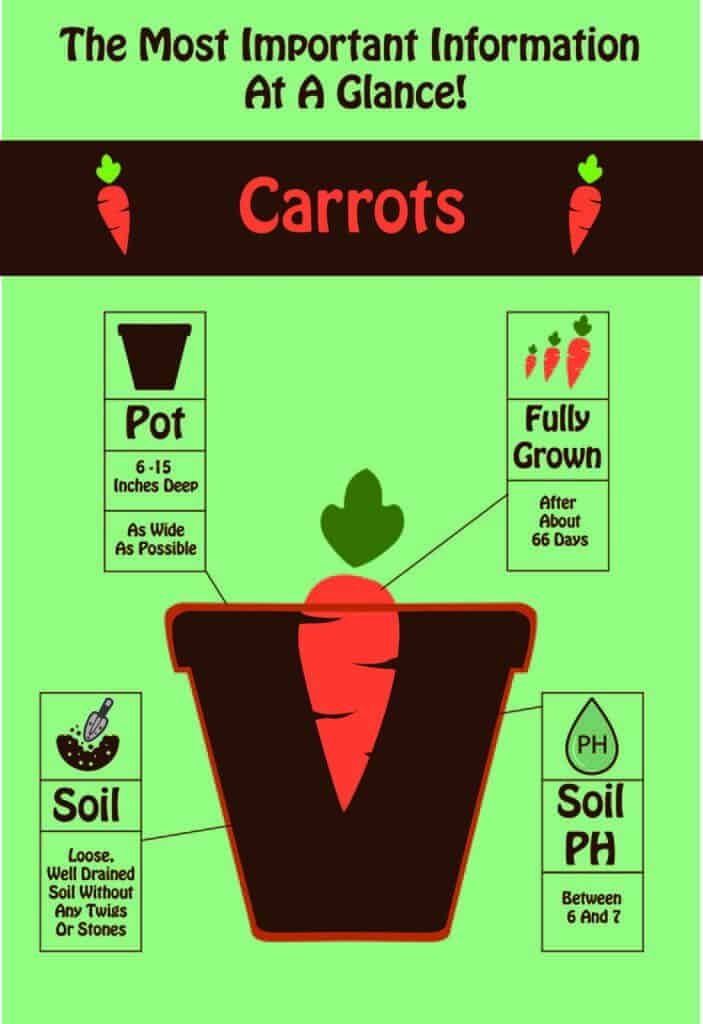
Here is the most important information for growing carrots in a pot at a glance. The detailed information can be found further down below!
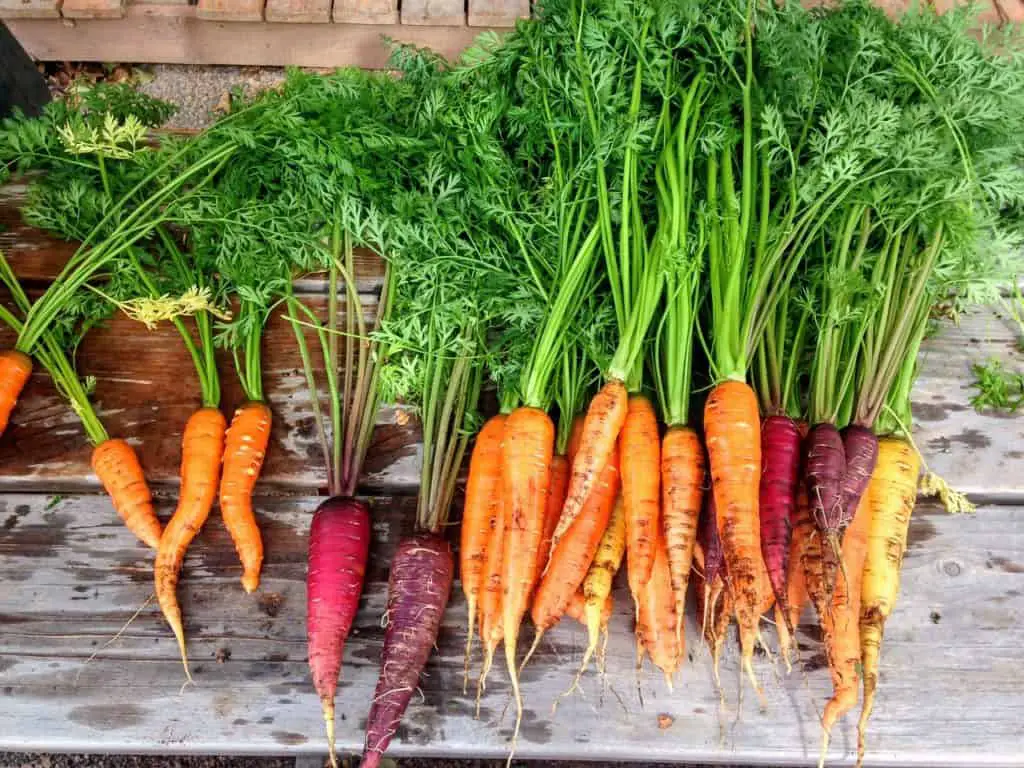
The Best Soil For Growing Carrots
You might have come across some forked or crooked roots of carrots which are malformed and mutated.
While edible, these carrots lack the right appeal of well-grown carrots and might look a bit strange.
That is the result of using the wrong soil for growing carrots. Before you sow the tiny seeds, you should know how to adjust your soil and prevent distorted and stunted roots.
Moderate soil that’s neither too alkaline nor acidic will provide the best conditions for planting healthy carrots.
Carrots grow well in loose soil with a soil pH that’s between 6 to 7, good drainage and also free from stones, twigs, or any other hard items.
Compost or soil that’s not smooth, but has obstructions like stones and twigs will cause your plants to develop hard or oddly shaped carrots with two or three legs.
It’s good to purchase high-quality soil to use in your planters or create your own.
A good carrot soil profile will offer you the knowledge to get a bumper harvest of perfect and straight vegetables, which are perfect for fresh snacks and a range of many other recipe applications.
How Do I Balance The Soil PH
As mentioned earlier, growing healthy carrots needs loose soil as well as a heavy addition of some organic amendments.
Just like many other vegetables, carrots develop best when the pH of the soil is between 6 and 7. You can use a soil test to establish your garden soil’s PH, and then add the suggested amounts of lime to boost it if the pH is too low for carrot growth.
If the pH is too high, you’ll have to apply the recommended amounts of elemental sulfur to lower the pH of the soil to the desired level.
Keep in mind, however, that a soil pH test should be done every three or two years since the effects of sulfur or lime are eventually negated, and the pH of the garden soil will go back to its original range.
Best Temperatures For Growing Carrots
Root crops such as carrots are best planted directly into a well-prepared seedbed outdoors.
The temperatures that promote the germination of sowed carrots are between 16 and18 C or 60 and 65 F.
The best soil for carrot growth should be loose, free of clods and debris, and either sandy or loamy.
You should plant your seeds early during the spring season to avoid the hot summer, which can turn your carrot roots bitter and hard.
What Containers Should I Choose For Growing Carrots?
If you’ve got a limited garden area, you can grow some carrots in containers instead.
While most standard-length carrots do not grow pretty long in pots, many smaller variants thrive in them.
Ensure that your containers are deep enough to allow the edible roots to grow properly into the soil, and also keep your soil moist to maximize growth.
The container sizes should fall between 6 and15 inches deep depending on the carrot type you are sowing and the planting depth it needs.
When planting carrots in pots, you can use a container with a depth of at least 12 inches and as wide as possible to grow most of the crop varieties.
You can utilize planter bags, pots, window boxes, and tubs to grow these root vegetables.
The deeper your container is, the better. Carrots grow underground, and their root system requires a lot of space to develop.
Similarly, the wider your pot, the more plants you can grow. The planters should also have enough drainage holes to prevent the carrots from rotting due to excess water.
The types of planter used do not matter a lot as long as it has a good depth. Plastic, stone, or clay is fine, whether rectangular or circular.
If your container does not have some drainage holes at the bottom, you can easily drill your own.
Choosing The Right Carrot Varieties For Container Growing
Perfectly shaped and cone-like carrots aren’t a guarantee when you are growing your vegetables.
However, selecting a suitable variety, particularly when growing carrots in containers or planters, should offer you a great opportunity for a good harvest.
Most containers or pots are pretty shallow to grow some tap-rooted veggies such as carrots, and the pots dry out pretty fast.
But if you go for the right varieties of carrots for the depth of your window box or pots, and ensure that the containers get enough water, you can easily grow sweet and delicious carrots on a terrace or an apartment deck.
The longer the carrots, the deeper the root zones they need to form uniformed and well-shaped carrots.
Shorter varieties like Oxheart, Chantane, and Round varieties are perfect for container planting.
Round carrots like Rondo or Parmex are perfect for farmers trying to avoid some funny shaped carrots.
Radish-style round carrots such as Romeo also grow pretty well in containers or planters as shallow as 15cm. Oxheart varieties have only two to three inches of roots at maturity.
Chantaney carrots are among the best choice, with red cored varieties being the most popular cultivar.
They’ve got the classic carrot traits, broad fat shoulders and a tapered triangular with blunt tips.
Chantaney carrots grow between four to five inches long, and their short length is usually perfect for planting in container gardens.
Preferably grown in spring, Chantaney varieties are best suited to planter boxes with a depth of 12 to 15 inches.
Nantes varieties such as Bolero and Scarlet Nantes are the most common carrot seeds to find on the market. They form 15-20cm (6-9″) roots, and you can grow them in a 30cm deep pot or planter box.
Deeper planters or pots work even better.
If you are planting carrots in planter boxes that are shallower than 30cm, you should consider “Mini” Carrots such as Adalaide Baby and Babette.
These carrots form some mature roots at small sizes, and you can also harvest them at finger-length.
Preparing The Planting Containers
A half-barrel or any other containers filled with planting mixture can make a perfect place for growing carrots.
Prepare the planters by turning your soil to a depth of twelve inches.
If your planting soil is heavy with lots of clay, add well-aged compost and sand to the containers and turn it under using a garden fork or bare hands. Loose soil is ideal for growing carrots.
Make sure that you clear the containers of stones and clods which can cause your carrots to grow malformed or the roots to fork.
Sprinkle some bone meal across your containers, but don’t add any manure to the container soil before sowing your carrot seeds.
Bone meal is usually rich in phosphorus content, which encourages the development of roots; the nitrogen in compost will cause your carrot plants to grow some hairy roots.
Water the containers deeply and allow it to sit one day or two before planting carrots; you need evenly moist soil for fast germination and growth.
How To Plant Carrots In Containers?
Carrot seeds are usually tiny, which makes it pretty easy to over-sow the planters.
Mix your carrot seeds with a bit of sand in your hand to make it easy to sprinkle the seeds across the planting containers, and you will know where the seeds have been sown.
You can also use pelletized seeds as an alternative because they are incredibly easy to hold and also sow one by one or use seed tape.
The seed tape and pelletized seeds will relieve you from having to thin your seedlings later on.
You can sow your seeds evenly and thinly across the planters, or you will eventually want to give every carrot one inch or a bit more to develop all around.
Utilize the handle of a rake or garden hoe to create a shallow trench to help you sow your seeds in straight rows.
Cover the seeds lightly with approximately ¼ inch potting soil or peat moss.
Utilize a board or the heels of your hands to slightly press down the soil covering the seeds to help the seeds to make contact with the prepared soil, which is important for germination.
Thinning Carrots Planted In Containers
Once your carrots have germinated and sprouted, it’s time to thin your crop.
Generally, most carrots require around one to two inches of spacing between them, but it’s good to keep your seed packets to determine what’s best for that carrot variety.
Thinning is essential so that every carrot plant can receive adequate moisture and nutrients without competing with the others in the pot.
That will ensure that your crop looks delicious and is full of flavor when harvested. If you would like to eliminate the thinning step, you can bypass it by buying seed tape or some pelleted seeds that are already spaced.
The thinned carrots can be used in a wide range of cooking applications like great toppers for fresh salads or roasting.
How To Take Care Of Carrots Planted In Pots
Once your carrot seedlings have attained a height of about one inch high, you should trim two out of three down to close the level of your soil, leaving only one plant per every planting group.
After a few of days mound up a bit of soil to help straighten them back up if the stems of the plants start to lean, and make sure that the roots are fully submerged in the soil.
If the orange roots are exposed to sunlight, they’ll turn green and also taste bitter. Your tasty container grown carrots will be ready after 2 1/2 months, and you can harvest them one or two weeks beforehand if you want them sweeter.
How To Water And Mulch Carrots?
It is essential to keep the containers moist until your carrot seeds sprout.
You should sprinkle the planting containers once or twice every day using fine spray during the first few weeks.
Do not allow the carrot soil to dry out. As the roots start to grow, you should water the plants deeply for continuous and even development; deep watering usually means keeping your soil moist to below the root tips.
Carrots and many other root crops normally follow the moisture in the soil. When the green tops start to wilt, it’s time to water. Once the soil dries to a depth of three inches, it’s time to water.
Moreover, deep watering will also encourage the taproots of the crop to grow straight.
Cover the containers with some floating covers to protect all the shallow seeds from the overhead drips of irrigation or rain that may uncover and also expose the seeds.
Where the climate is dry and hot, you can use burlap strips to cover the planters. Sprinkle the burlap strips with water to keep your containers moist until the seeds sprout.
Make sure you look under the protective cover at least once in a day or two; once the seeds sprout you can remove the burlap covering.
However, you can keep the floating covers, especially if temperatures fall below 40°F in your area.
How To Apply Fertilizers To Carrots Planted In Containers?
Just like other root crops, carrots need a high amount of phosphorus to grow properly.
Because carrots have only one thick taproot instead of multiple little fibrous roots, the area from which they can take in phosphorus is fairly small. The surface area of the roots of a large carrot cannot be compared to the root-surface area of plants with multiple fibrous roots, such as pepper and tomatoes.
Unlike a lot of other nutrients, phosphorus is not absorbed by plants as they draw in water.
Instead, it is absorbed through diffusion, naturally progressing from a place of higher concentration in the soil to an area of lower concentration, particularly inside the roots.
The soil zone from which phosphorus is absorbed is usually limited to an incredibly small area around the roots.
If your soil tests show a need for this important nutrient, adding some organic phosphorus fertilizers, like rock phosphate or bone meal, to the planting containers a couple of weeks before seeding ensures that the developing roots have easy access to this important nutrient right where it is needed.
Carrot Pests And Diseases You Should Watch Out For!
Adhering to good practices for carrot growing is the best way of preventing pests and diseases, putting you ahead of carrot disease pressure.
However, there’s always the possibility that carrot growth will be afflicted by some carrot pathogens.
Since inadvertent damage to carrot roots, whether incurred by pests or mechanically, can often cause secondary infections, it is also good to practice crop rotation regularly to prevent the menace from spreading.
Not all carrot pests and diseases are obvious at the beginning. The ones affecting the top part of the plant will be instantly apparent, but it might be pretty disheartening to see what appears like healthy crops growing pretty well in the containers only to dig them up and discover the carrot roots riddled with tunnels.
Carrot plants can be affected by these plant pests and diseases:
Carrot Rust
This carrot disease is caused by rust flies that lay eggs in the container soil around the top part of carrots.
These eggs later hatch into some larva that burrow down in your soil, and then into the roots of the plants.
The larva moves to rust-colored munch channels in the carrot, especially in the two-thirds of the lower root.
Aster Yellows Disease
The Aster yellows disease in carrots is normally caused by a rare type of bacteria called a phytoplasma.
It’s not a bacteria, and it’s transmitted by the aster leafhopper insects, in the same way, malaria is transmitted by mosquitos.
This disease leads to stunting of the carrot roots, leaf yellowing, and the top part that gets bushy and short, and it’s sometimes known as a “witches broom.” The Aster yellows disease destroys the flavor of the carrot, making it inedible.
The only method you can use to control the disease is by organically preventing the aster leafhopper insects from landing on the crop by growing carrots under row covers such as Reemay.
Leaf Blight
Carrot leaf blight is usually caused by the Alternaria fungus. Alternaria leaf blight leads to brown or yellow spots on carrots, which can get pretty bad that they fuse, making the tops of your carrots look burned in the long run.
Carrot Weevils
Weevils appear more like beetles than flies and also lay their eggs in the soil, particularly around the carrot plants.
Just like the carrot rust larvae, the larvae burrow into the carrot plants, but the carrot weevil larva normally channels into the upper part of the carrot plants.
Parsleyworms
Parsleyworms are relatively beautiful green caterpillars that have alternating orange or black bands and white bands.
They chew away the top growth in an insatiable caterpillar fashion.
Bacterial Soft Rot
Just like its name implies, the bacterial soft rot is typically a soil-borne microorganism that eats chunks of your carrot roots into a mush.
Nematodes
Both needle and root-knot nematodes are some microscopic roundworms found in the soil that can cause malformed roots, root branching, and galls in carrots.
These nematodes only develop if the soil is over 55 degrees, which means early planted carrots are rarely affected.
Tips For Controlling Carrot Pests and Diseases
There are no good controls for the above common carrot diseases, especially after your carrots get affected.
However, prevention is usually the best method if you’re an organic farmer, and the following tips will help you avoid carrot diseases and pests.
• For bacterial and fungal diseases, removing all the affected carrots, practicing garden hygiene and good crop rotation for the following years are your best options.
• For insect pests or insect-borne diseases, growing your carrot plants under Reemay will help prevent insects from chomping away your carrots or laying eggs.
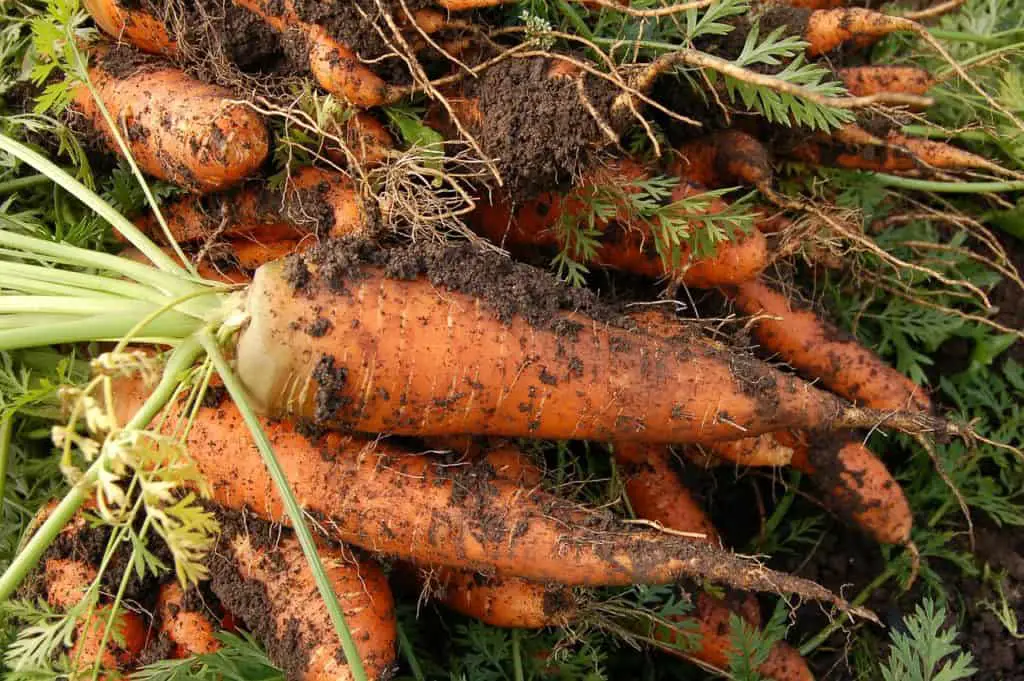
How To Harvest And Store Carrots?
Harvesting Carrots
Carrots are mature and ready for harvesting in about two to four months, or when they attain a diameter of at least ½ inch depending on the carrot variety.
You can also harvest when the desired maturity is attained. If you are growing carrots during the spring season and early summer, you should harvest before the daily temperatures become too hot, because the heat can cause the roots of the crop to grow fibrous.
Keep in mind that carrots taste better after several touches of frost. Frosts encourage the plants to begin storing energy and sugars in their roots for later use.
After the first frost during the fall season, you should cover your carrot rows using a layer of shredded leaves of around 18 inches to preserve them well for harvesting later.
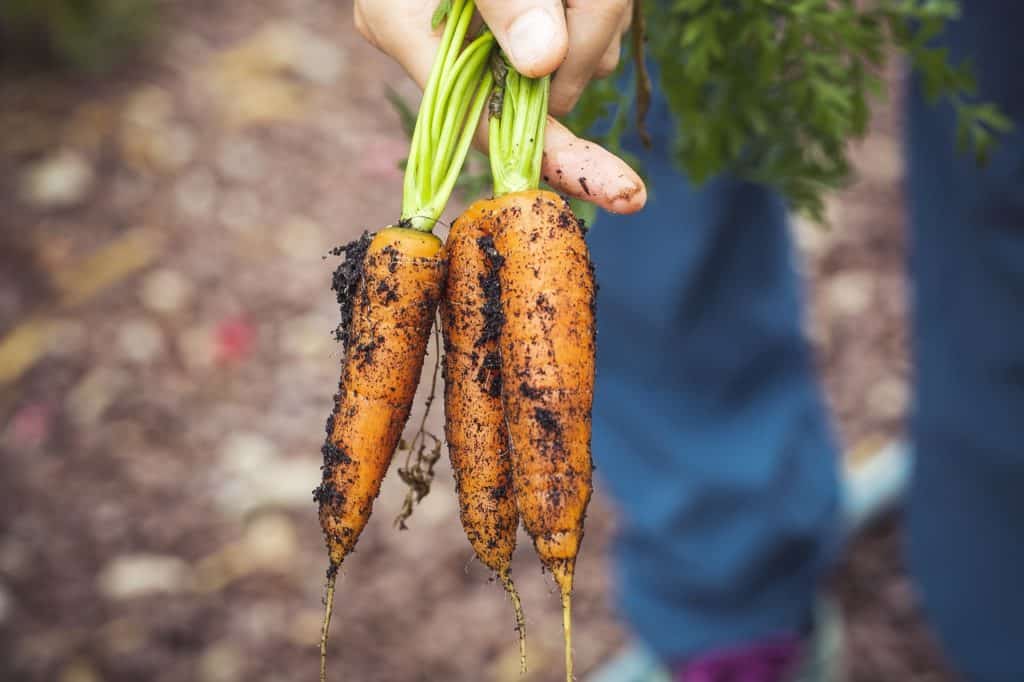
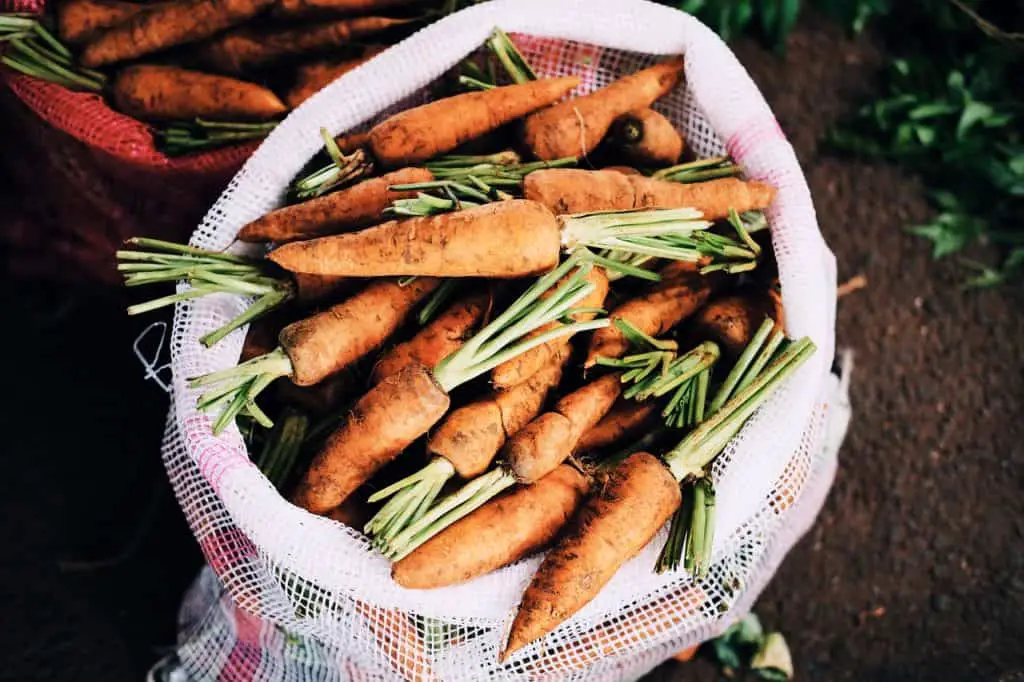
Storing Carrots
To store freshly harvested carrots, you should twist off all the green tops, clean off the dirt using cold running water, allow it to dry and put in airtight plastic containers, and then refrigerate.
If you put some fresh produce in the fridge, they will go limp in a couple of hours. You might leave fully grown carrots in the containers for temporary storage, especially if pests are not a problem and the area will not freeze. You can also store carrots in tubs filled with moist sand for use in winter.
Conclusion
Growing carrots in patio planters or containers is a wonderful way to start growing your vegetables at home.
Containers or planting pots make a perfect entry-level garden for most beginners, as well as providing some valuable vegetable growing area on patios, rooftop gardens, balconies or places with limited space.
While lots of containers might not suit carrots, there are numerous things you can do to ensure successful development and a good harvest of fresh carrots.
With that kind of teamwork and versatility taking root; your patio, sunroom, or garden can look any way you would like it to while still providing your whole family with nutritious, delicious, and home-grown produce.
The other benefits of planting carrots in pots are the great control you have on the quality of soil, lack of weeding problems, and a variety of alternatives for your landscape and garden.
The only drawback to planting vegetables in containers is that you need to pay a lot of attention to watering because the soil dries out faster in above-ground containers than a raised traditional garden.
