
Getting their namesake from the city of Brussels, these sprouts first became popular in Belgium, where they have been grown from around 1200 AD.
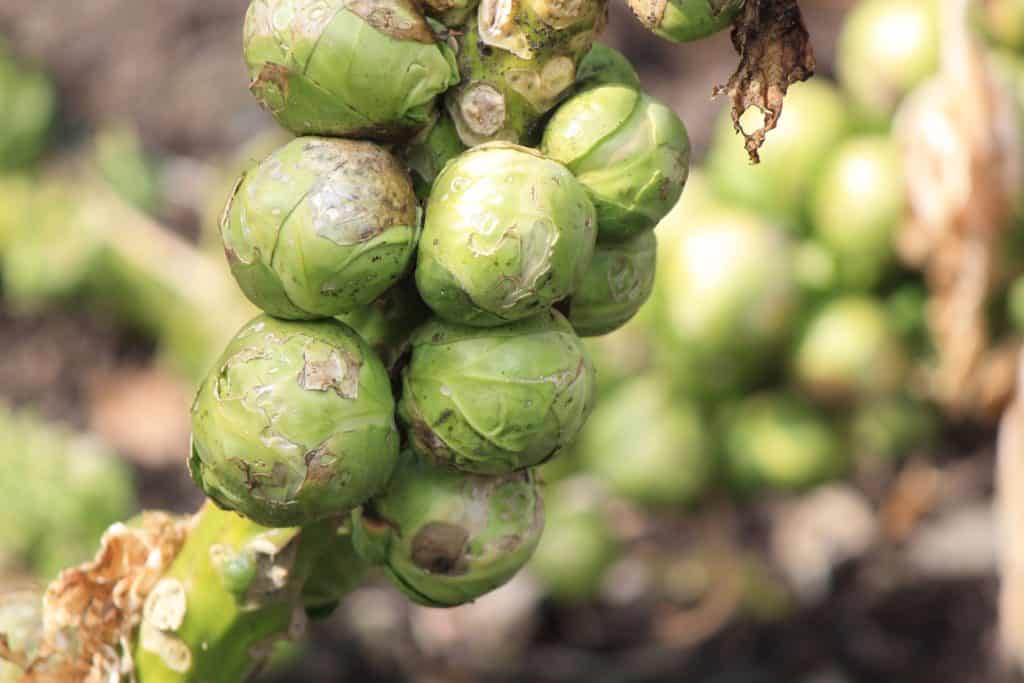
To get a little scientific for a minute, Brussel sprouts (Brassica Oleracea) are actually buds that grow in the axils of each leaf. Actually considered to be a tiny cabbage, as you can see from their shape and the way that the layers peel off easily.
The plant has the appearance of a small palm tree, and although the green variety is most common, there are also red Brussel sprouts as well.
With patience, Brussel sprouts can grow in nearly every vegetable garden; they require a very long growing season to reach full maturity. That said, one of the interesting features about the brussel sprout plant is the fact the sprouts actually taste better if they are hit with a slight frost.
Even though the planting season for Brussel sprouts is a little late in the year, they can still have the needed time to mature fully because of this.
Because they tend to thrive more in colder temperatures, Brussel sprouts are considered by most to be a fall crop in warmer climates. Due to their nature, if Brussel sprouts are grown in a warmer climate, the sprouts tend to open; which intern makes them unfit for consumption.
Although best suited for regions that aren’t hot and humid, Brussel sprouts are a bit of a paradox in the sense that they need full sun in order to achieve optimal growth. When we refer to full sun, it means that they need at least six hours of sunlight a day, like many vegetables.
What Variants of Brussel Sprouts are There?
There are six main variants of Brussels sprouts:
Bubbles
Bubbles mature in 85-90 days and are heat/drought tolerant.
This variant yields 2-inch sprouts, and they are resistant to powdery mildew and rust.
Jade Cross
Jade Cross mature in 90 days and was a 1959 all-American selections winner.
This is a compact plant that is good for windy regions, is disease resistant and the sprouts tend to be bigger than with other varients.
Long Island
Long Island Improved has a high yield, and mature in 3 months time.
Similar to the Jade Cross variant, they are smaller plants and are resistant to moderate winds.
Oliver
This one is considered to be an early producer and is easy to pick.
Although with this one, the sprouts are a little smaller and generally are 1-inch in diameter.
Another compact variant that is resistant to diseases.
Royal Marval
Royal Marvel mature in 85 days, which means they mature relatively fast, and grant high yields.
They are resistant to bottom rot and tip burn.
Rubine
Rubine the purple variant of Brussels sprouts, rubines are late to mature and have lower yield than the green varieties, but have an excellent, buttery flavor.
What Kind of Soil to Use for Brussel Sprouts
When planting Brussel sprouts, choosing the right soil is key to ensuring their mature development, as well as obtaining the best yield during the harvest.
Brussels sprouts tend to prefer a sweet or slightly alkaline soil, with a soil PH of at least 6.5; but preferably higher.
A good amount of organic matter will aid in maintaining the amount of moisture that they need to promote growth.
When speaking of organic matter, we are referring to anything that is something with organic compounds that is added to the soil.
This can be a decaying plant or animal matter. For instance, compost, green manure, leaf mold, and animal manure are all viable options that when mixed in your soil, will ensure the proper moisture is there; promoting healthy growth.
To beginner gardeners, adding decaying matter may seem to be counter-intuitive, but it really does help the plants to thrive.
How to Plant Brussel Sprouts
Timing is Important
If you are in a colder climate region, it is best to start growing the Brussels sprouts indoors starting with the seed.
This should be done 5-7 weeks before the last projected frost. This will ensure that the seeds are growing without running the risk of subjecting them to frost.
To do this, start with your soil of choice; loosen and dampen the soil. It should be the consistency of a moist sponge. Using a small container, place the potting soil without packing too tight and add the seed to the middle, you will want to make sure that it is covered by the soil, but not buried.
Use at least 3 seeds per container, and make sure to water after you have planted the seeds. Through the next few weeks, you will want to continue to check the soil to ensure that it is adequately moist.
In warmer climates, it is recommended that you plant the Brussels sprouts during the fall.
However, it should be noted that hot temperatures where the temperature never really falls to a freezing point is not quite suitable for growing brussels sprouts.
Transplanting
When the seedlings are around 3 inches tall, you can now transplant them to your outdoor garden.
It is very important that while the seedlings are growing indoors, that you do not leave them too long before transplanting, as this can cause the seedlings to become root bound, which will lead to stunted growth later on.
When you plant the seedlings, you will want to space the plants around 2 feet apart with 3 feet between rows; alternatively, you can create a grid by staggering the plants 2 feet apart in each direction.
Brussels sprouts prefer that the soil they are in and surrounding them is firm, but not compacted. After planting, make sure the pat down the soil without packing it too tight; this will give the plants structure, without making them feel stifled.
How to Fertilize Brussel Sprouts
You will want to avoid over-fertilizing and should keep in mind that in one growing season, they really only need to be fertilized twice. This should be done first when they are around 1 foot tall, with the second time being a month before harvesting.
However, it should be noted that if you have fertile soil, fertilizing is not necessary.
One dosing of organic fertilizer that is slow release will be adequate to feed the plants for most of the season. As brussels sprouts are considered to be heavy feeders, it is important to make sure that at the time of transplanting, the soil is mixed with some form of organic matter.
To extend the life of your Brussels sprouts, harvest in the colder seasons. You can also mulch the plants with straw or cover for protection. Whole plants can be removed, transplanted into a pot, and stored in a root cellar.
Bare root plants stored in a cool and dry environment such as a cool cellar will grant you another 2-3 weeks of harvest.
Can Brussel Sprouts be Grown in a Container?
You can grow Brussels sprouts in a container, and the process to do so is really not that difficult.
with patience and little effort, you can have this buttery and healthy vegetable at home. The process for planting brussels sprouts in a container is essentially the same as when planting them in an outdoor garden.
You will once again want to start with the seeds and let them grow prior to transplanting. For proper germination, the soil temperature should be 45-85 degrees F.
If you want to skip the seedling process, you can find transplants in one of the local nurseries.
You will want to sow the seeds at least 1/2 inch deep, and wait for a few days for the baby plants to appear; this usually takes 5 – 20 days. Once the seedlings have begun to penetrate the soil, you will want to start the thinning process by saving the healthiest seedlings only.
Once these have grown to around 5 inches, it is time to transplant them to your pot of choice. You can now start to fill the pot with soil; something that is slightly clayey will help the plants to establish firm roots while keeping the soil moist.
As with planting in an outdoor garden, you will want to pay attention to the PH of the soil and add organic matter.
When growing these plants in containers, staking is a good method in order to prevent them from falling over. This is especially true if they are in a drafty area, as they are top-heavy plants. When growing Brussels sprouts in a container, it is not necessary to mulch the soil; however, doing so will keep the soil cool and moist.
What Type of Container to Use
When choosing the container for growing Brussels sprouts, you will want to have a 5-7 gallon-sized planter.
This should be at least 12 inches deep, and 12-14 inches in diameter.
It should be noted as well that you will want to limit one Brussels sprout plant per one container of this size. If you are wanting to grow a couple of plants together, you would want to choose a pot that is a minimum of 15 gallons, and at least 18 inches in diameter.
If you are growing in a region that is not prone to frost, you will want to choose a clay pot, as they tend to remain cooler. Clay pots also have great drainage, as well as provide good air circulation.
Can Brussel Sprouts be Grown Indoors
It is indeed possible to grow Brussels sprouts indoors. However, as they need at least six hours of sunlight per day, and enough air circulation while avoiding a spot that can get a strong cross breeze (as brussels sprouts are prone to falling over due to their thin bases).
Once you have a spot with enough sun and air circulation, you can follow the steps listed above to plant the brussels sprouts in a container that will be kept indoors.
The region that you live in can determine where you will want to keep your brussels sprouts indoors. For instance, if you live in a warmer climate, placing them in a cooler area will help to promote healthy growth. However, you will want to make sure that they are receiving at least 6 hours of sunlight a day. Alternatively, if you live in a colder region you will most likely find that if they receive an adequate amount of sunlight, they are fine being by a window or cooler area.
Harvesting Brussel Sprouts
Patience is key towards the end of the season when getting ready to harvest Brussel sprouts.
They take around 3 months to fully mature. Although the plant itself grows relatively quickly, they do not start producing sprouts until they reach almost full height (2-3 feet). Brussels sprouts start maturing from the bottom of the plant and continue upwards.
Carefully noticing the size of the sprouts can be an indicator of when it is the right time to harvest. You can start to harvest the sprouts once the lower sprouts start to reach the size of large marbles, or small bouncy balls. You will want to make sure to harvest before they get too large, as they can start to crack and turn bitter.
A pro tip that will make removing the sprouts easier is to remove the leaf below the sprout first, then twist and pull the sprout. Similar to picking apples or peaches, you will want to get down the twisting motion, as this will loosen up the sprouts without damaging them. Alternatively, you can cut the sprouts off using pruning shears.
The amount of yield for each plant varies by a multitude of factors, but generally, each plant will provide a quart of sprouts. After harvesting, in some cases, another crop of Brussels sprouts may start to grow at the base of the stem. Although these are not as good as the first batch, they are still edible.
Brussels sprouts really are amazing plants, and almost all of the plant can be utilized. The top of the plant is also edible and can be cooked as a source of greens. Harvesting the top of the plant will encourage the development of the remaining sprouts, and is a good idea to remove at the end of the season.
Once you have harvested your Brussel sprouts, you can now trim off the bottom parts; as they are generally tough and hard to eat. After that, simply drizzle with olive oil, sprinkle salt & pepper, toss to coat and throw them in the oven.
Pest to Look Out For, and How to Eliminate Them
Because it is a late-season crop, you are given time to look out for and eliminate problems before the sprouts start to form. Similar to cabbage, the most common pests to look out for when growing Brussels sprouts are:
Cabbage Looper
Commonly known as ‘inchworms’, the cabbage looper can be identified by their unique way of moving around; they double up as they inch along.
This is because they lack any type of hands or feet, and have to use their bodies in order to move around. Cabbage Loopers eat the leaves of cabbage crops, such as broccoli and Brussels sprouts.
While this may not seem to be much of a big deal, this is just where the damage starts.
These pests eventually will bore holes into the sprouts, leaving behind fecal matter in their wake. They can be devastating to your crops, although early detection can save your gardens.
Eliminating Cabbage Loopers is not easy, and if you see a crop is infected by these pests the best thing to do is to simply discard the tainted crops before they spread to other parts of your garden.
They are easy prey to larger predators, and growing herbs that attract these predators can help to cull the population if needed. For instance, growing parsley, dill, fennel, coriander, and alyssum attracts other harmless insects that can feed on the Cabbage loopers. You can resort to some sprays that contain Spinosad, which is a biological agent derived from fermentation.
This can help to eliminate the Cabbage Loopers.
Cabbage Worms
These pests are common for crops in the cabbage family; they are velvety green in appearance with a few faint yellow stripes.
While not damaging in single appearances, as they will generally chew on the leaves; they can be devastating to your crops when they begin to start laying eggs. They feed on foliage, and if left along can devour whole crops. Their fecal matter can also stain and contaminate produce.
One of the best ways to eliminate these pests is to wet the leaves and sprinkle cornmeal on them; the worms will eat the cornmeal, swell, and eventually die off.
Cabbage Root Maggot
These pests can be responsible for completely ruining the yield that you would have received from your crops.
These maggots are the larvae stage of the cabbage root fly, which will lay its egg at the base of a plant. When the eggs hatch, they become these small, white worms.
It is nearly impossible to eliminate cabbage root maggots, and once they are in the root of your plants the only real course of action is to pull up the whole plant and discard it.
However, you can control the population of cabbage root flies. This will prevent the occurrence of the maggots, which as stated above, can have devastating effects on your crops.
There is no spray, organic or pesticide, that will eliminate cabbage root flies. The best way to avoid them from appearing is to place row covers over your plants. This will stop the breeding cycle, as it prevents the fly from being able to lay their eggs at the base of the plants.
Aphids
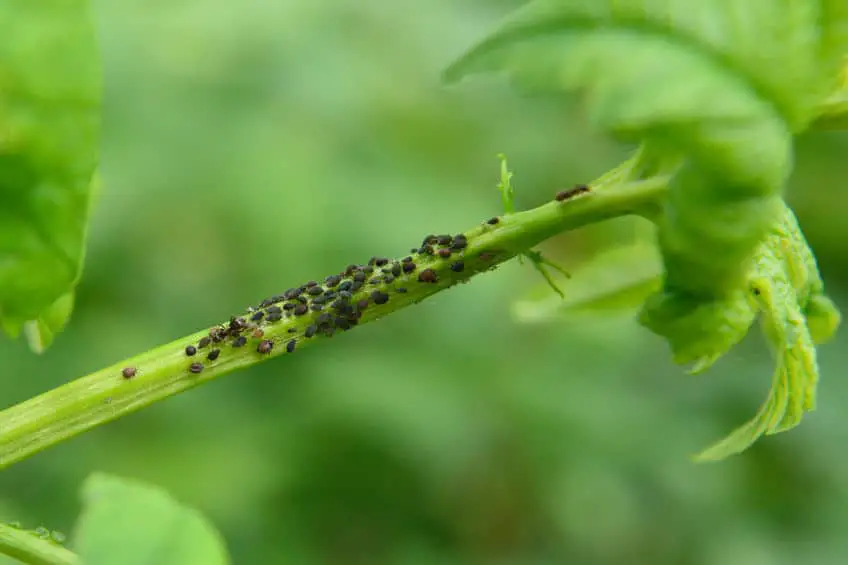
Aphids are small pear-shaped insects that can be a variety of colors from green, yellow, brown, red, or black.
One of the most dangerous things about aphids is the fact that as they feed, they secrete large amounts of honeydew; which attracts ants, and promotes mold growth on leaves.
The rate by which these pests can multiply is astounding. There is no male presence, and the in spring wingless female aphids give birth to nymphs.
Within a week, these nymphs mature and give birth to more nymphs. As the colony grows, the most mature aphids start to sprout wings and travel to create other colonies.
Controlling the population of aphids is best done by using organic sprays that will eliminate their presence without harming the plants. Additionally, as with Cabbage Loopers, you can grow other herbs nearby that will attract natural predators of aphids.
There are also many companies that can come out to spray your property for insects and bugs; they generally use non-invasive chemicals that are safe for your family and crops.
Harlequin Bugs
Harlequin Bugs are quite gross and treacherous insects that you will want to eliminate as soon as you find. They are a type of stinkbug that feed on the juices inside of cabbage leaves.
The damage is apparent on the leaves and stems, depending on the species. Keeping these insects at bay is best done by understanding their life cycle, and breaking it.
By plowing all plants and fallen debris at the end of the gardening season, you will take away the shelter that they desperately need in order to survive the year.
Even with preventing them from appearing the following year, you may still spot them on your plants. If you do, finding a spray containing Spinosad should take care of them before they start reproducing.
