
Growing Melons in Containers is very possible however it is a bit tricky and there are quite a few things you have to consider. So in this guide, I will tell you all the little things and tricks, that will help you to successfully grow Mellons with great results. So let’s get started!
What you will need to Grow Melons in Containers
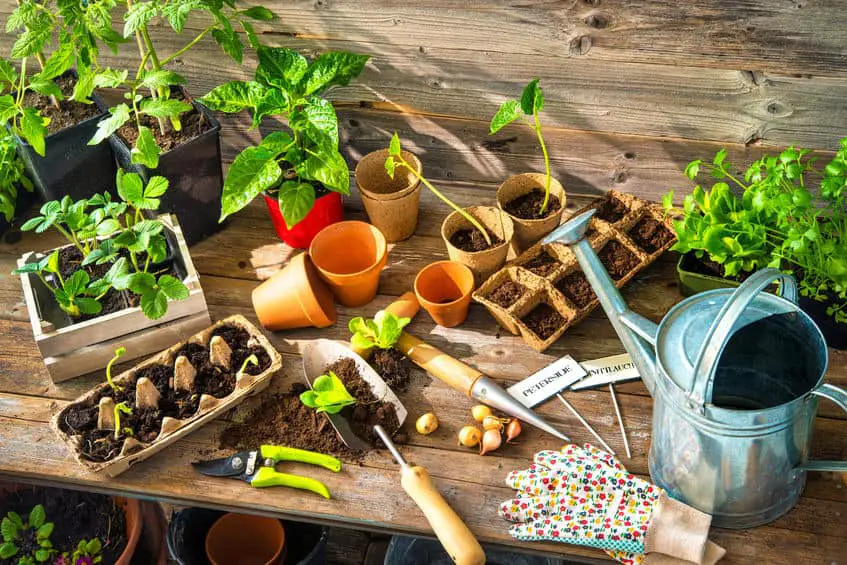
Smart Pot
This is a special type of container. It is made out of unique material that is aerated. This means that when the roots reach the sides of the container, instead of wrapping around the pot, the plant is going to do something called air-praying.
This is a process in which the plant will form a nice fibrous mass, allowing the plant to absorb more water, air, and nutrients, therefore, enhancing the melons developing process.
You can also use normal containers to grow melons but if you are looking for the best possible results, going for a smart pot container is the best way to go.
Generally the bigger the pot is, the better the watermelon will grow because it simply has more space to grow its roots on the pot without restrictions.
A wire fence
A wire fence will allow the plant to grow in a vertical manner, instead of growing sideways.
The fence will save plenty of crucial space, but it will also help to have a cleaner container garden.
The fence will keep the plant from spreading to the sites and thus the plant won´t spread too much dirt outside of its pot.
Keep in mind, that from time to time, you will have to guide the plant through the fence in order to make the best use of it. Otherwise, the plant will just find its own way and the fence was for nothing. So try and guide the plant in the general direction, that you want it to grow.
Keep in mind that this fence’s main purpose is to save space and avoid, that the plant grows in ways, that you don´t want it to go!
It won’t affect the watermelon’s final size, shape or flavor. So, if it doesn´t matter to you, that the plant is spreading over the boundaries of its container, then you can just leave the plant be and don´t use a wire fence. It’s your choice really.
The Right Soil
Watermelons need a very loose and drained soil in order to grow efficiently. The soil is a very important part of the watermelons development so it is very crucial to get the right one.
A good option for this type of plant is the Miracle-Gro Garden Soil. Of course, you have the option to choose any other soil you please, this is just my personal recommendation. But Generally, as long as the soil is well-drained, you won’t have any problems.
Choosing the right variety
The “Bush Sugar Baby” is one variety, that I would recommend. It does not grow too big and it is comparably easy to care for.
Small Pots for the Seedling
Before using the big “final” pot, you are going to need a smaller pot in the beginning.
In this smaller pot, it can be anything from a nursery pot to a simple plastic cup, you are going to plant the seed and raise the seedling until it is big enough to be transferred to the bigger final pot.
Before you transplant the little plant make sure, that its roots have developed nicely and the actual plant is strong enough.
A good indicator is when the roots have reached the sides of the pot, then you can transfer it to its final home. Just carefully remove some of the soil covering the roots and take a quick peek to find out how the roots are doing.
How to plant Melons in Containers the right way
Grow the seedling
First off we are going to grow the seedling in a little pot.
So get your smaller container and fill it to about halth with your soil. now carefully place the melon seed in the pot and cover it with soil untill the container is almost compleatly full.
Place it at a spot, where it is hit by direct sunlight for some days and wait for the seed to develop and transform into a little plant with leaves and roots.
Always water your little plant and don´t forget to check up on it every day!
Keep an eye on the weather and if it is a very hot and dry day, it may be necessary to water the plant twice instead of only one time, since it may dry out because of the heat and it could even die if you are not careful.
If it starts raining, take the plant inside to protect it from an excessive amount of water. Just a little bit of rain should not be a problem but if it gets too much the plant could even drown.
Transfer the plant to its final container
Once the seed has finally grown to an actual plant with leaves and roots, it is time to start the second part of your melon-growing adventure, which is preparing the Smart Pot container.
The process of preparing the Smart Pot Container is pretty simple and the principle and the process are basically the same as with the little nursery pot before.
You are going to start up by placing garden soil in the bottom of the Pot (It can be recycled soil as long as it is fresh, humid and loose), then add compost, any ordinary compost will do, and mix it thoroughly with the soil.
After finishing the mixing and blending, form a little hole in the middle of Soil. This hole you have just prepared is the place where the plant you have just grown is going to be placed. So simply take your seedling carefully out of your container with the soil attached to it thanks to its roots, and slowly place it in the hole.
Bury it carefully and make sure that all the roots of the plant are submerged inside of the Smart Pot container.
After preparing your pot it is time to place the wire fence.
Place it gently around the plant just so that the plant has no other way but to grow vertically and not sideways, keeping your planting-station free from dirt and keeping your plant from creeping out of the pot.
Keep in mind that the whole point of the fence is to stop the plant from growing sideways so remember to move the vines through the gaps if they grow out of the wire fence.
Caring for the Melon Plant
Remember that it is crucial to give the plant water daily depending on the weather if it is very hot, give the plant more water, if the weather is average, give the plant the regular amount of water.
It is also meaningful to note, that once the plant starts gaining more volume, it may be necessary to increase the amount of water that was being given to the watermelon, otherwise it may die or simply not grow as much as it actually could. The plant can grow to about 22 to 26 inches long by 10 inches in diameter, or 56 to 66 cm by 25 cm in diameter.
And don´t forget to fertilize the plant! The best fertilizer for melons is one, that is high in phosphorous, like the 10 – 10 – 10. Follow the instructions on the Fertilizer to use it correctly. Depending on the actual brand the amount to apply to the plant may be different.
To apply the fertilizer, simply make a little trench next to the plant and fill that trench with the fertilizer. Then carefully cover it with soil. The roots will absorb nutrition on their own.
after 60 to 90 days, depending on how well you cared for your plant, you are going to be able to harvest your first self planted melon.
Parasites and how to aoid or fight them.
If you live in a very natural or rural area, there might be a possibility that the watermelon gets infected with parasites.
Parasites are organisms that live in or on other organisms and take their nourishment from that organism or Host.
Usually, this activity leads to the damage or death of the host. So if you think that your watermelon might be in danger because of these external agents, try using pesticides on your plant.
Usually, when a plant has been attacked by a parasite or got a disease there will be signs, that will show that. So keep an eye open for weird looking or partially eaten leafs, damaged vines or miscolored leafs.
When you spotted such a sign, you should immediately react. Try to identify the parasite or disease and get the necessary pesticides.
Don´t worry though, if you keep your plant indoors or in a city the odds of your plant getting sick is very slim!
Use gloves when you are gardening
There are a good amount of people out there that are capable of handling dirt and compost with their bare hands just fine.
But, especially when you are handling fertilizer or if you are naturally a little bit more sensitive to allergic reactions, then you should wear gloves!
Gloves should also be used because there are certain compounds in the natural world that can lead to skin infections or contamination if working bare-handed.
So to avoid this you can simply get yourself a nice pair of gloves, they can be latex gloves, vinyl gloves, or even nitrile gloves. All of these options are fine and should be fairly easy to get for everyone!
Final Words
Growing your own melons is a lot of fun and not nearly as complicated as you may think. It also not very work intensive and there really is nothing better, than to eat something, that you yourself grew from a little seed.
So don´t be afraid of trying it for yourself and who knows, maybe you will start your very own little container garden!
